Playground
The Playground is the primary area for creating and testing your bem functions.
From here, you can create and edit entire function trees, configuring settings of individual functions and relationships between them, using the DAG view.
Creating a New Function
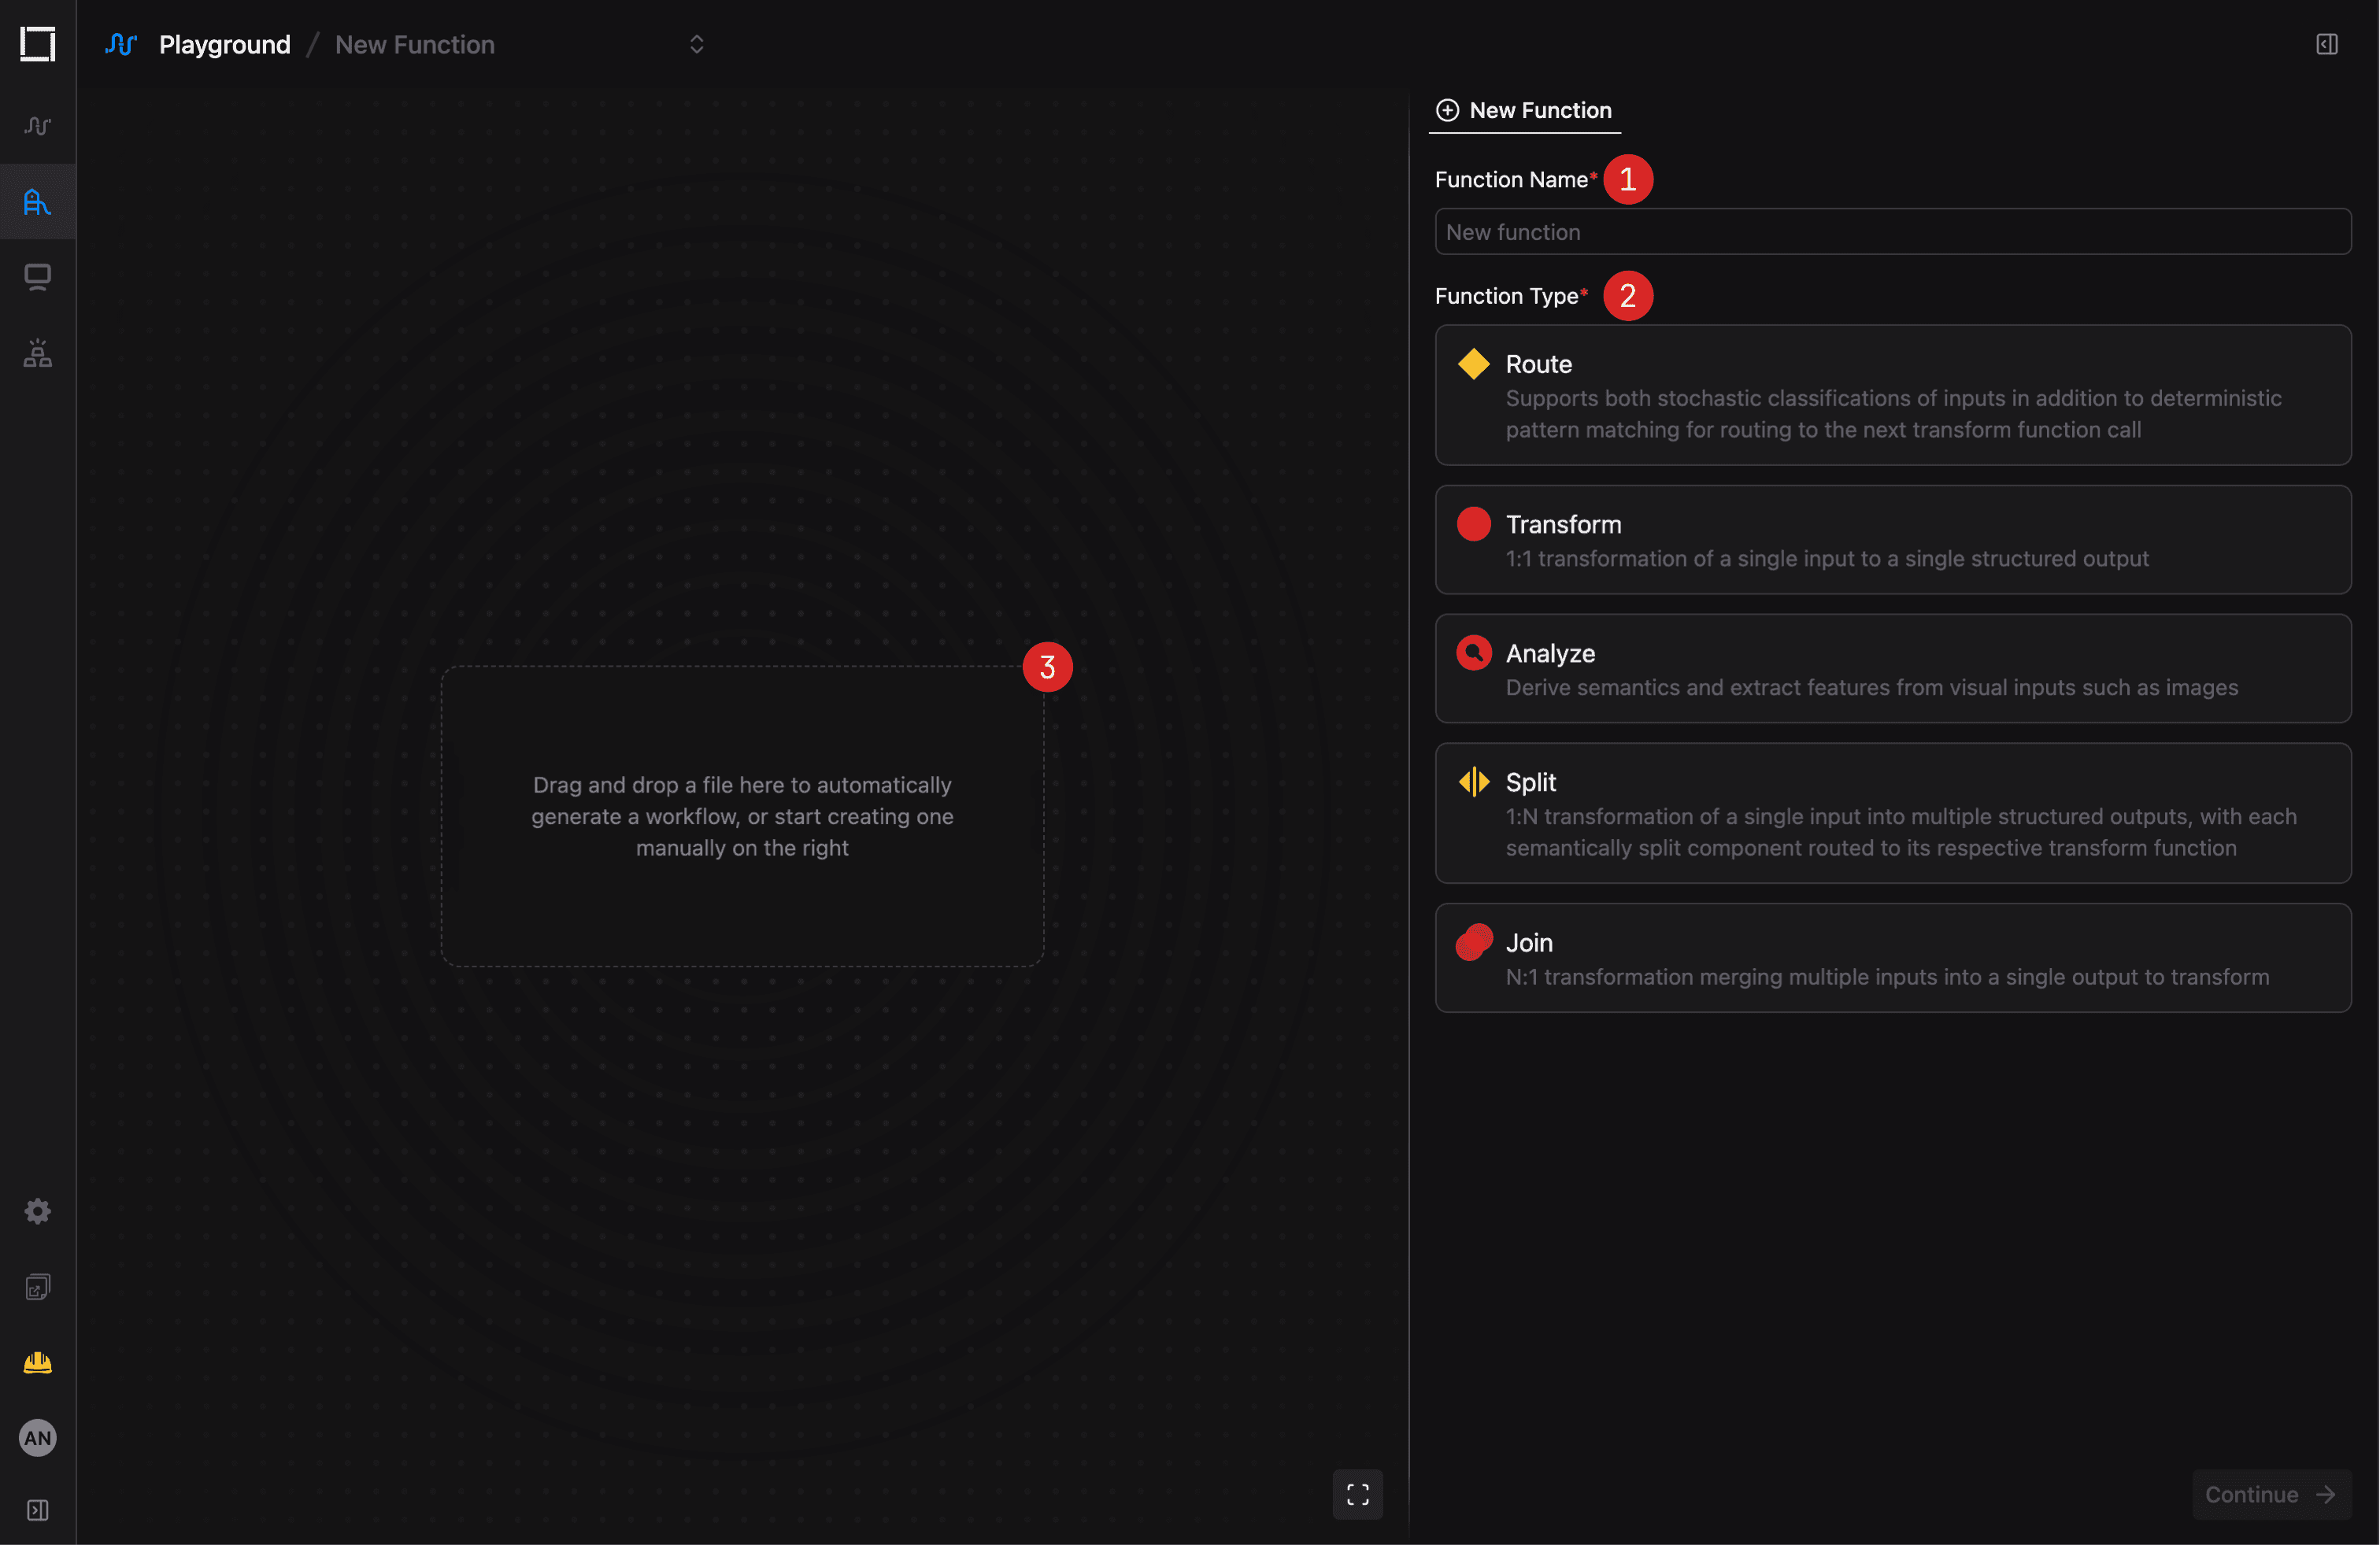
There are two ways to create a new function from the Playground:
- You can do it manually, by providing a Function Name(1) and selecting a Function Type(2).
- You can drag and drop a file to the dropzone on the left(3), for the Playground to auto-generate a
transformfunction for you;
Navigating the Playground
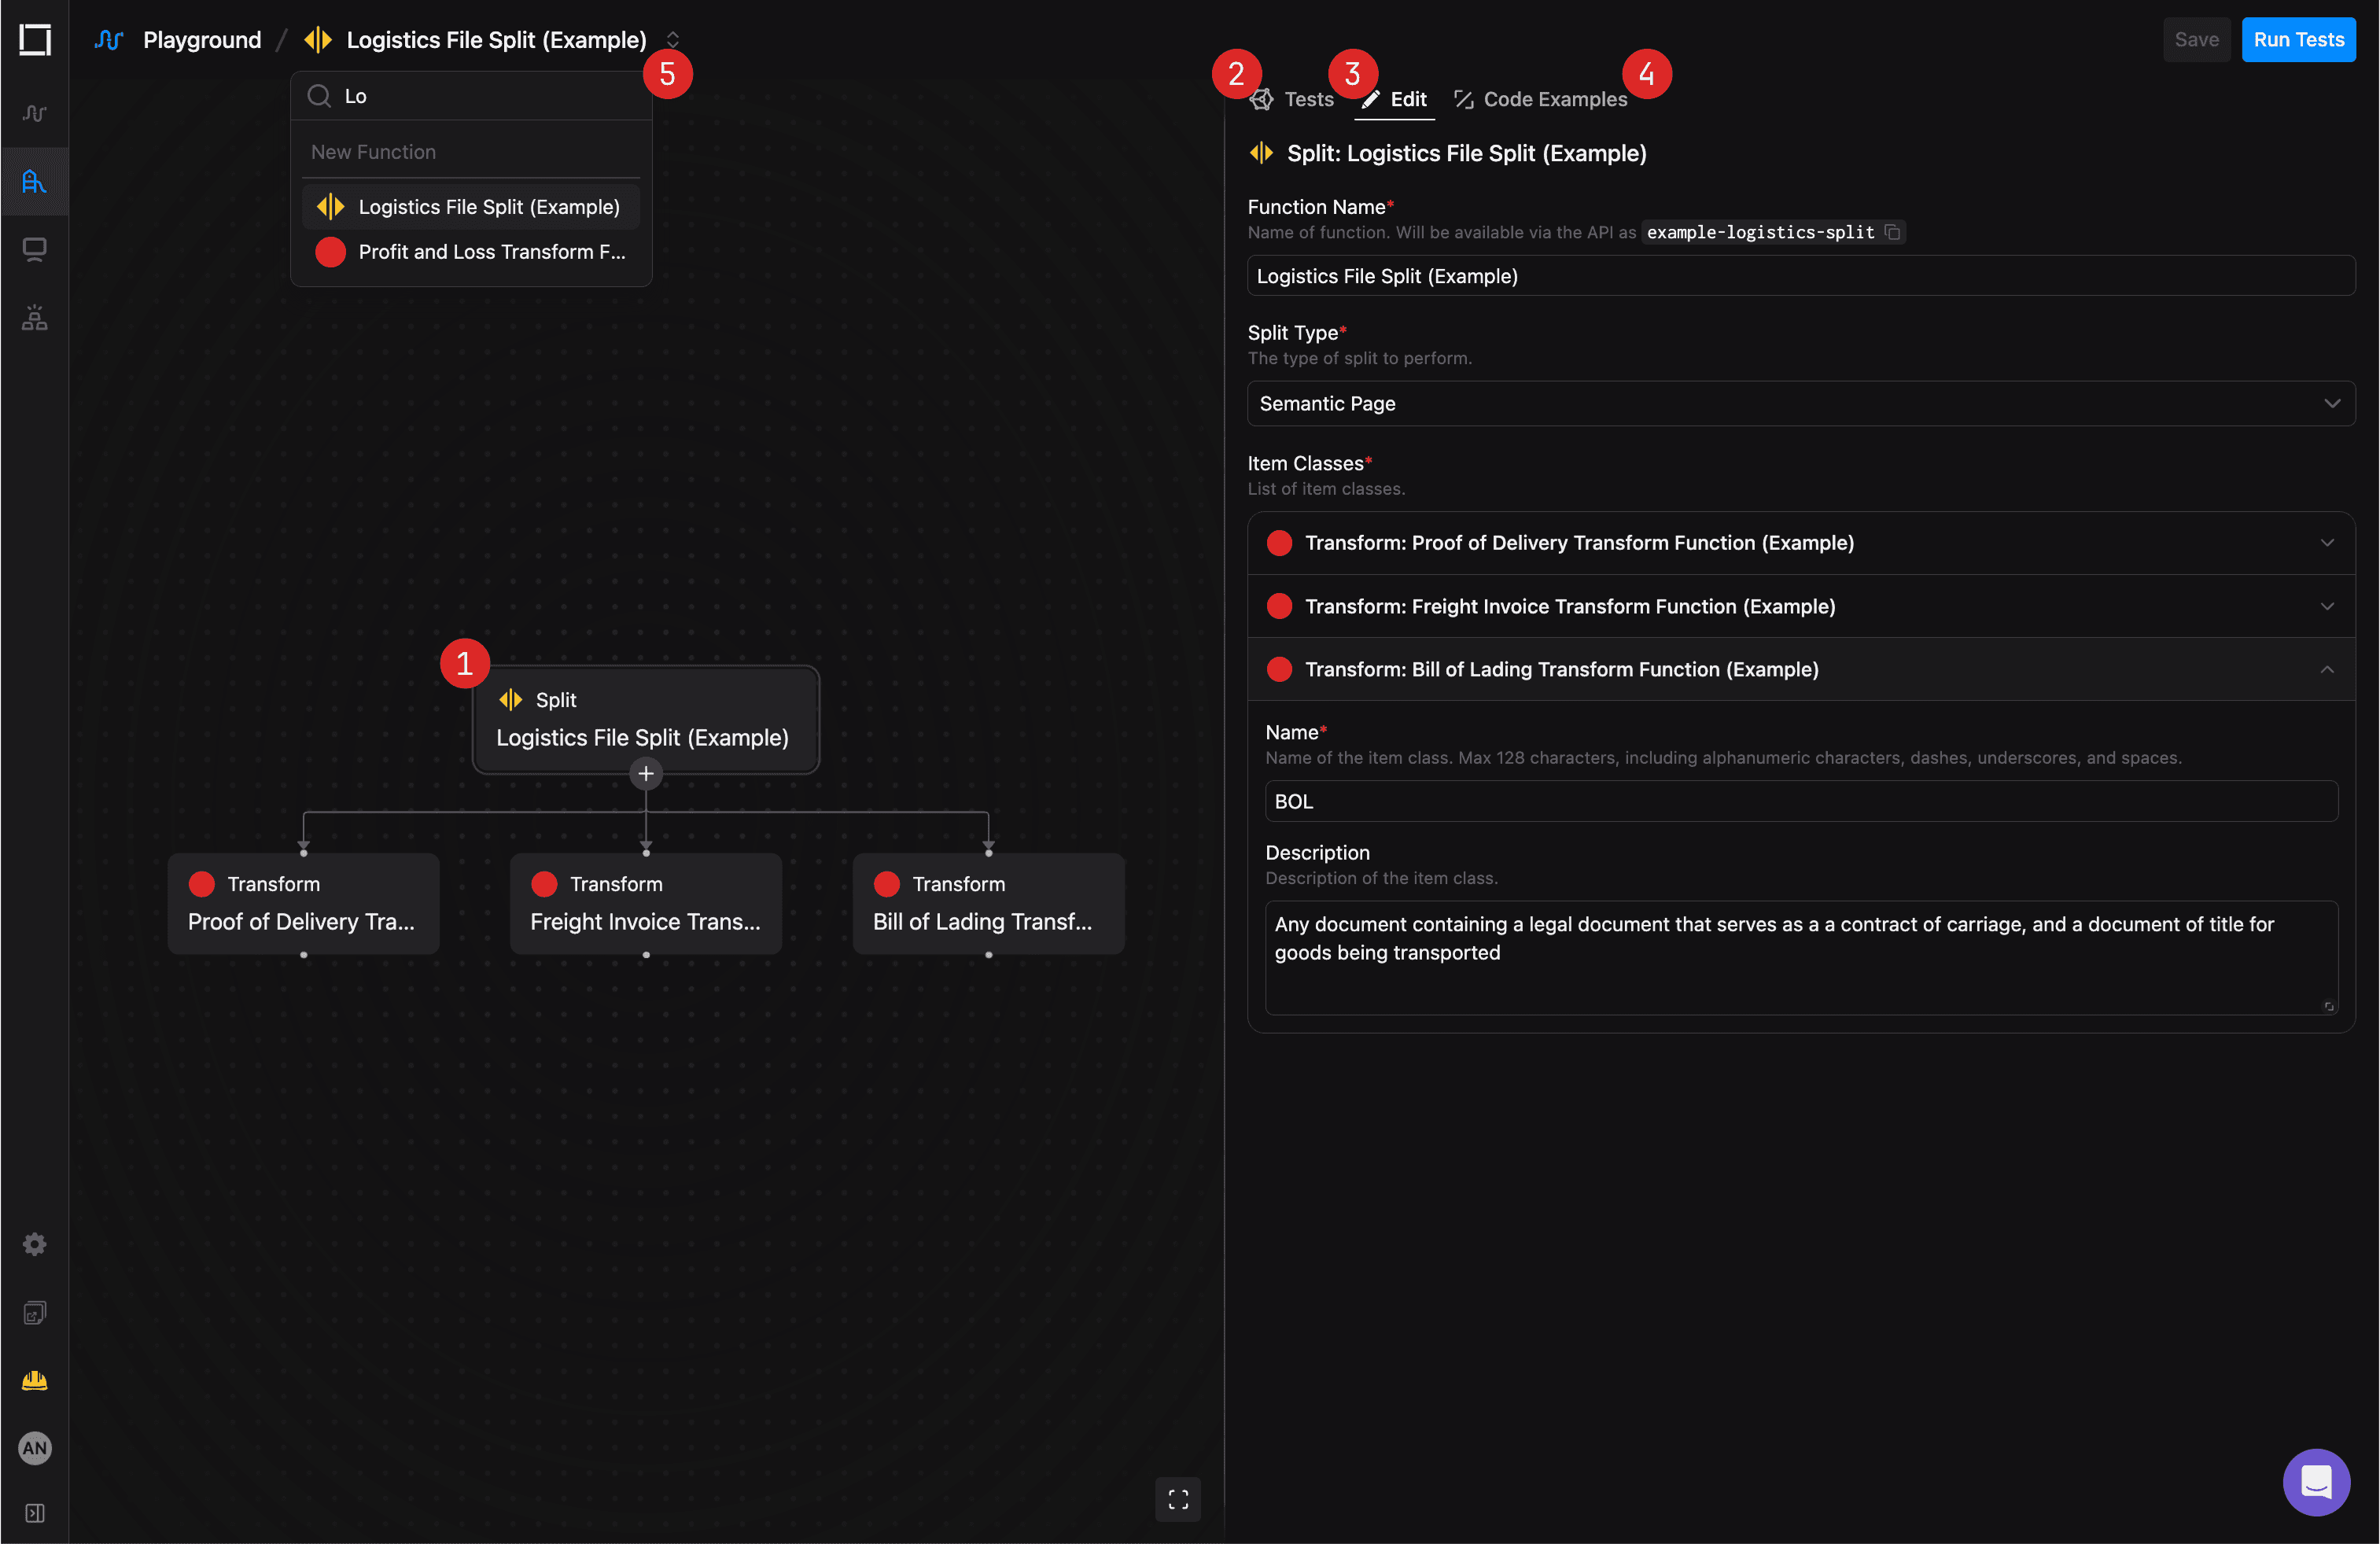
Once you've created, or selected an existing function, you get access to the full capabilities of the Playground, composed of two main areas:
- The DAG view(1) on the left, where you can inspect and edit the function tree;
- The control panel on the right, split into three tabs:
- The Tests tab(2), where you can run tests against the function;
- The Edit tab(3), where you can edit the settings of the selected function;
- The Code Examples tab(4), where you can view and copy code examples for using the function via the API.
You can also switch between different functions using the dropdown menu(5) on the top of the Playground.
Configuring Functions
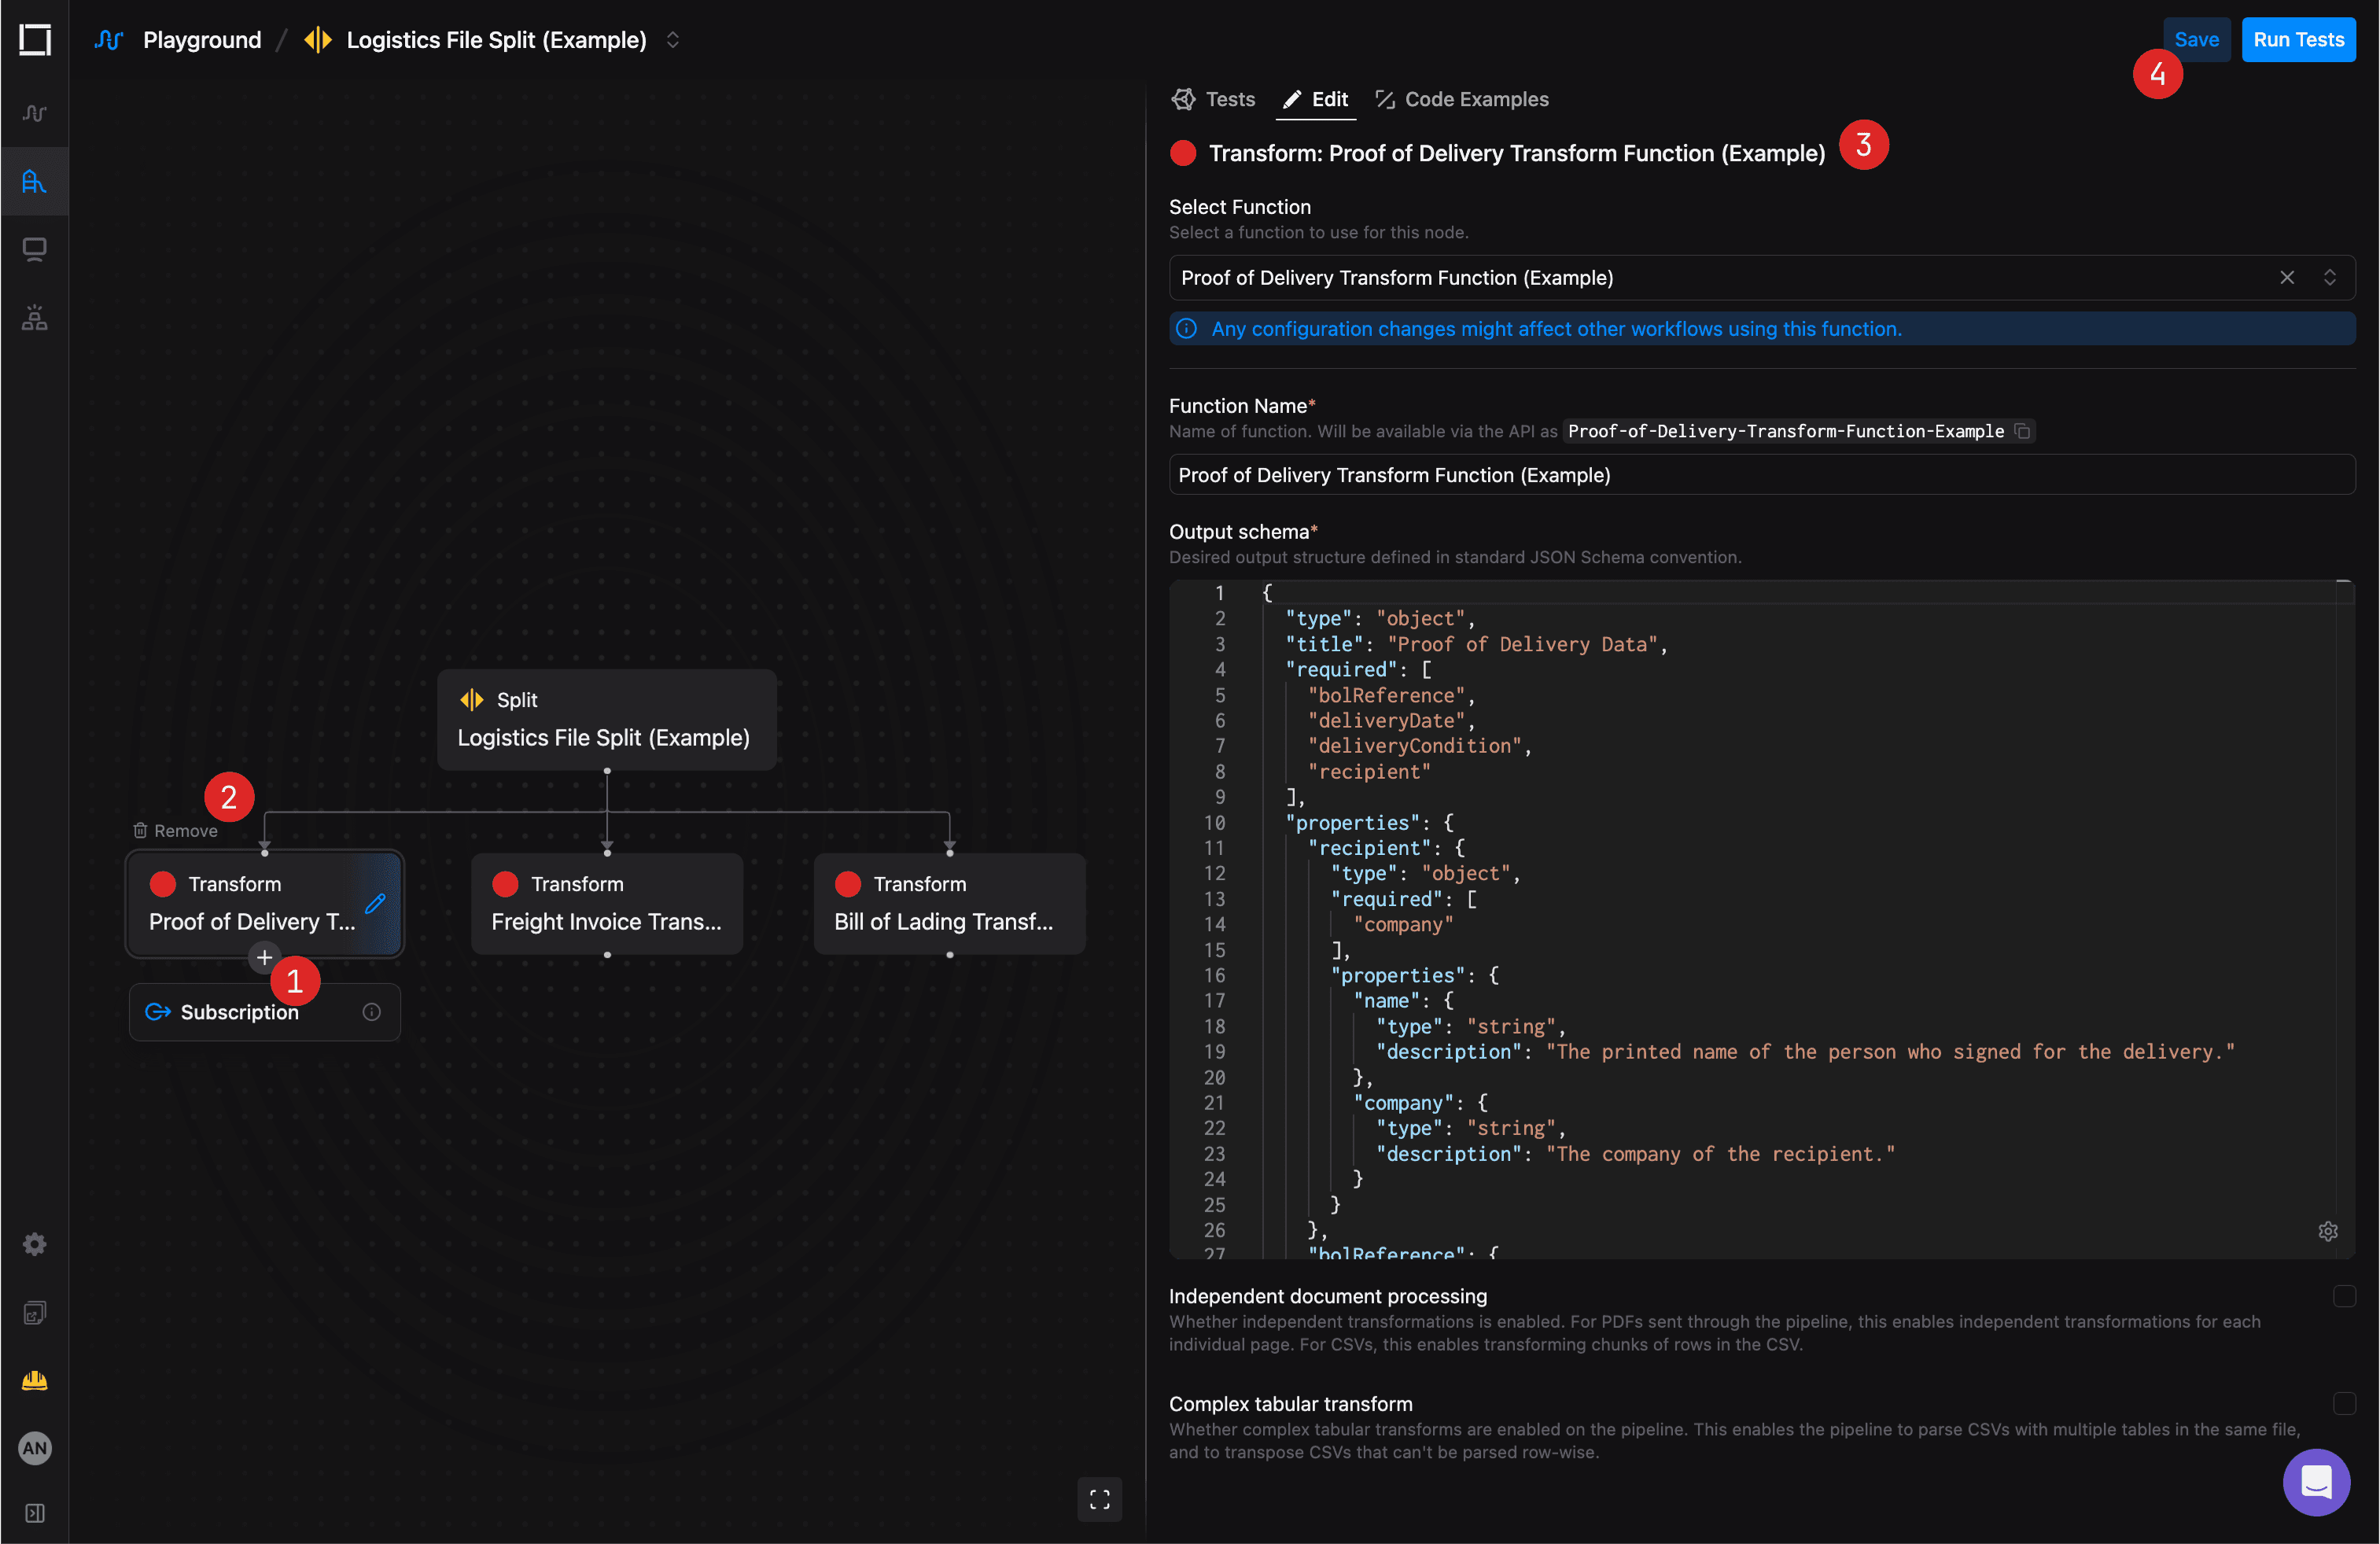
Building your function trees is a matter of adding, removing and editing individual functions.
To add a new function to the tree, hover over the parent function node and click the + button(1) on the bottom to add a new child function.
Only Route and Split functions support child functions nodes.
You can also remove any child function from the tree by hovering over it and clicking the Remove button(2) in the function node's top-left corner.
Same steps apply to adding and removing Subscriptions - special nodes you can add to any function node to register a webhook Subscription for the function's events.
Configuring the function's settings' is done in the Edit tab(3) of the control panel on the right.
Once you're done, you should save your changes by clicking the Save button(4) in the top-right corner.
Testing Functions
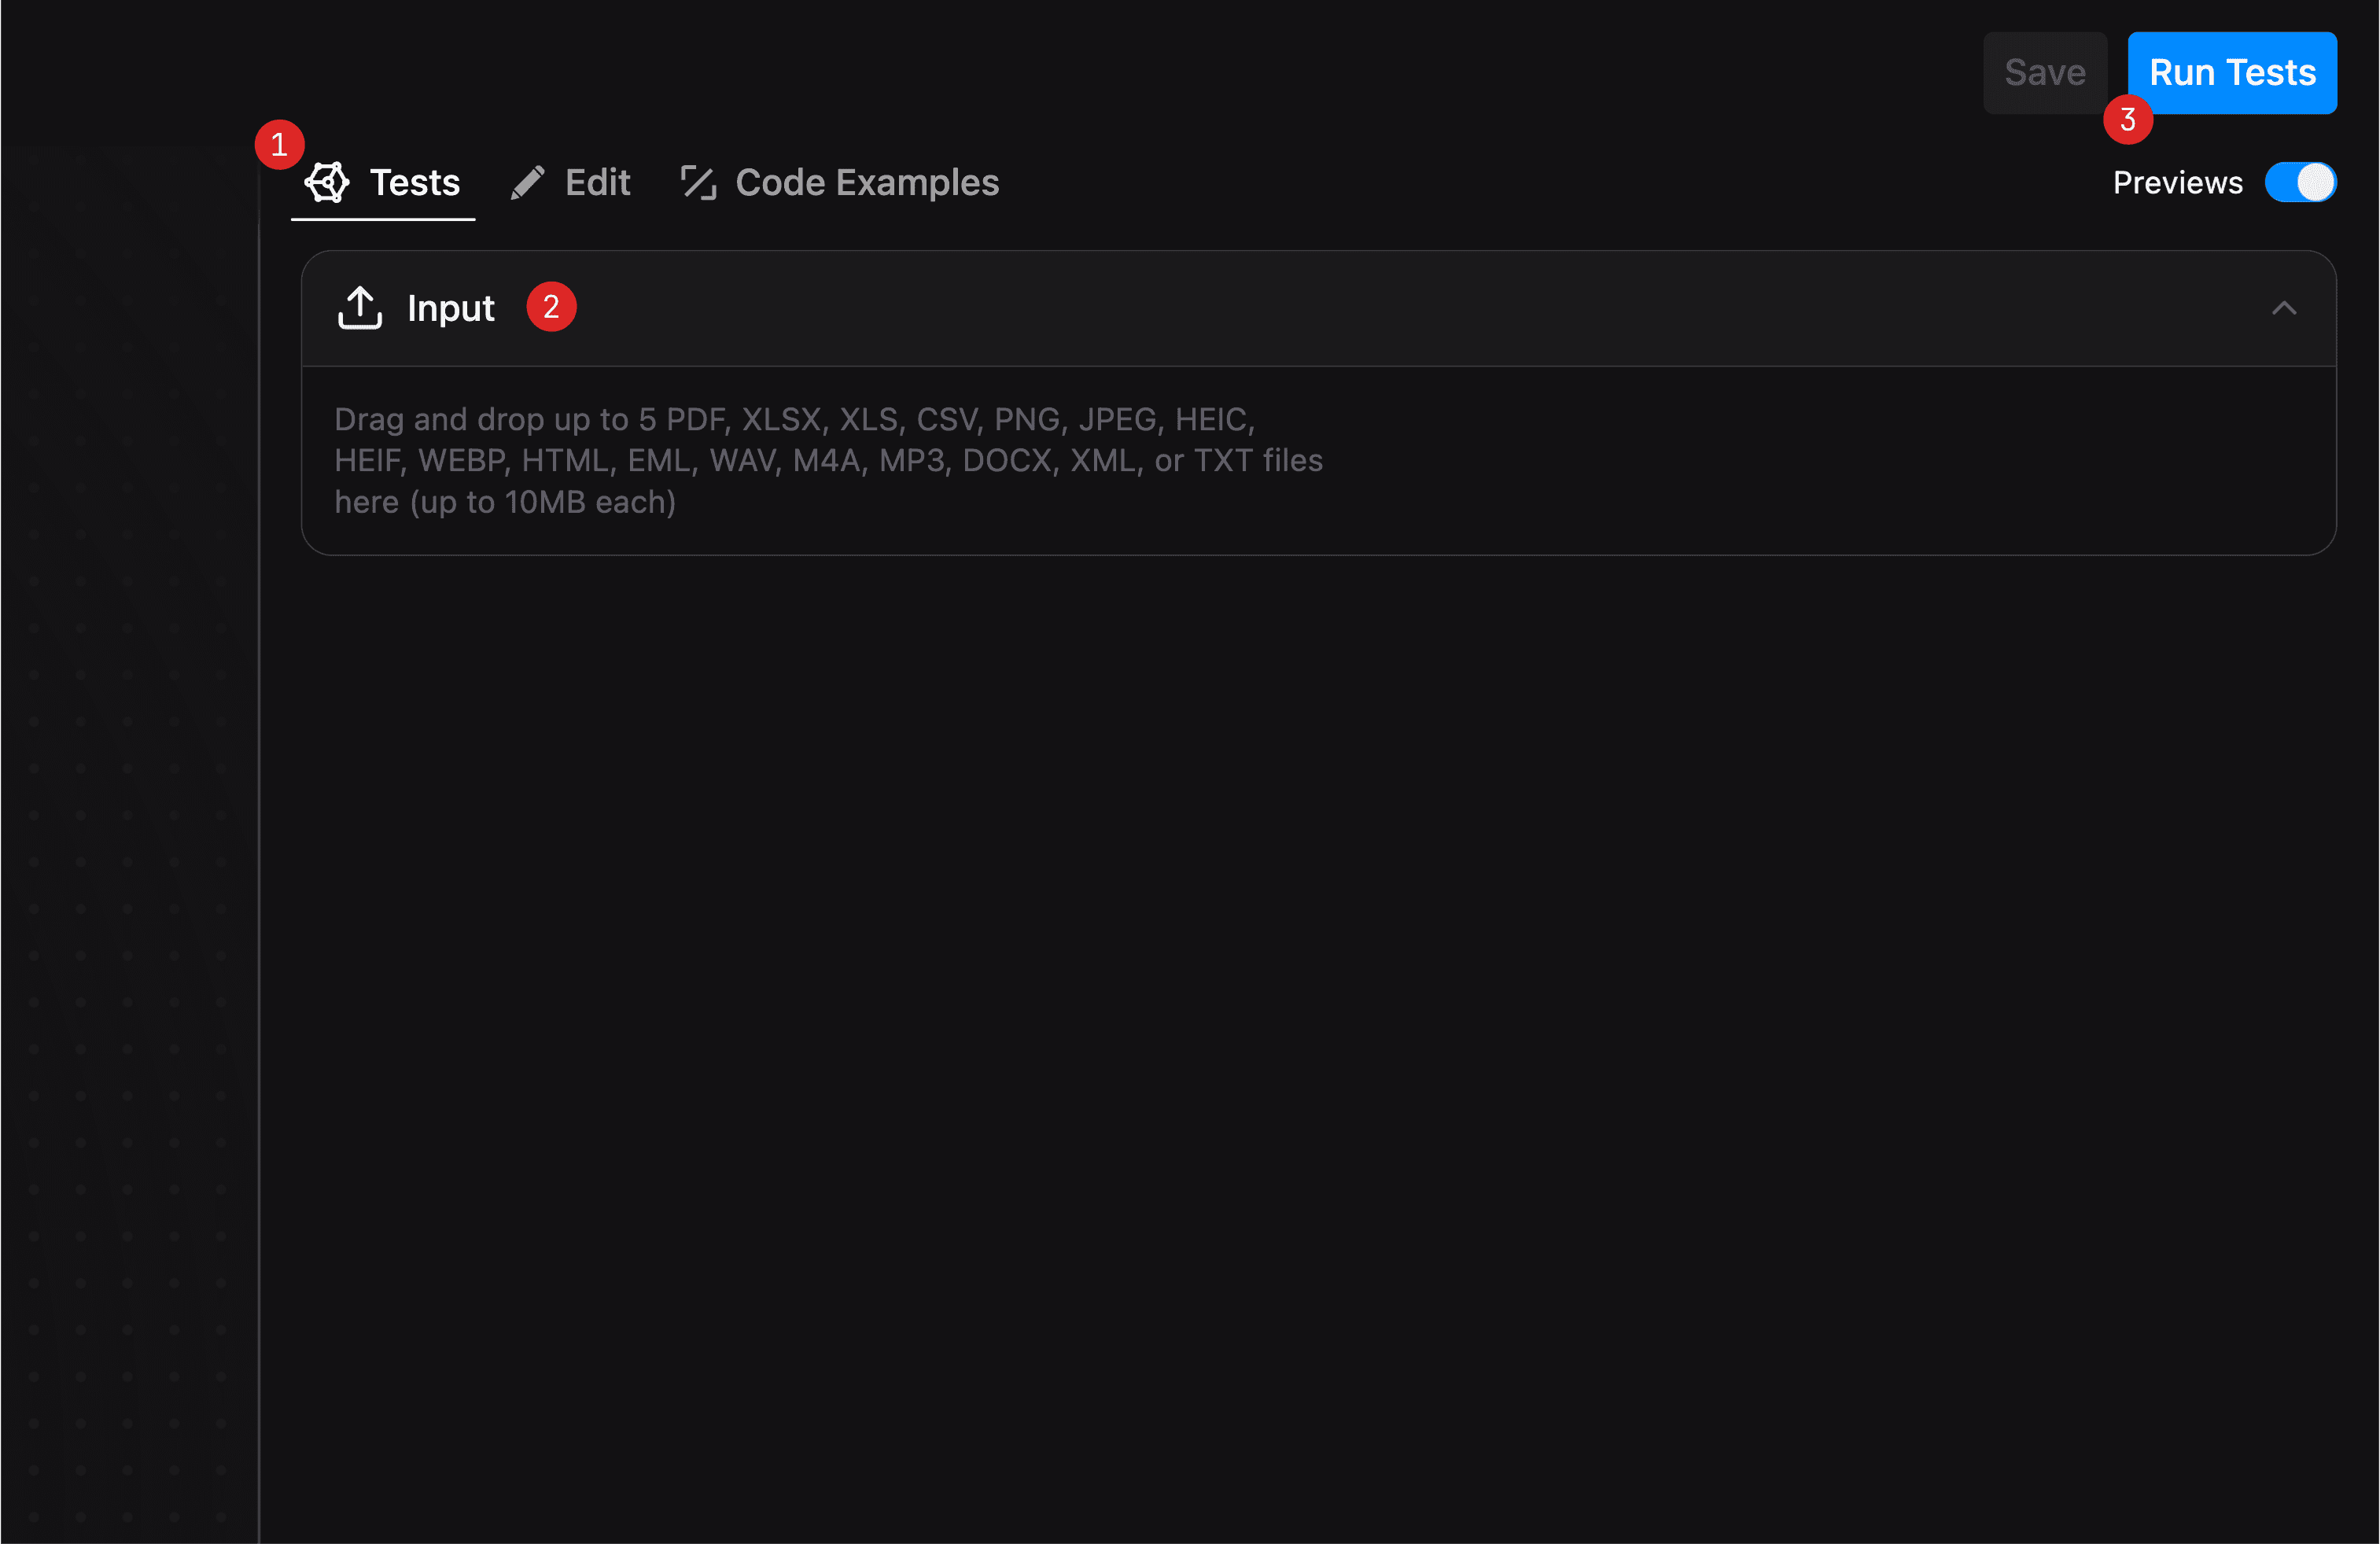
Once your function is saved and fully configured, you can test it against your data in the Tests tab(1).
- Pick up to 5 files to test the function with, by either dragging and dropping them into the collapsible Input area(2) or by clicking it to open the file picker;
- Click the Run Tests button(3) in the top-right corner to run the tests using the selected files;
- After a few seconds, the first results will start to appear.
Working With Test Results
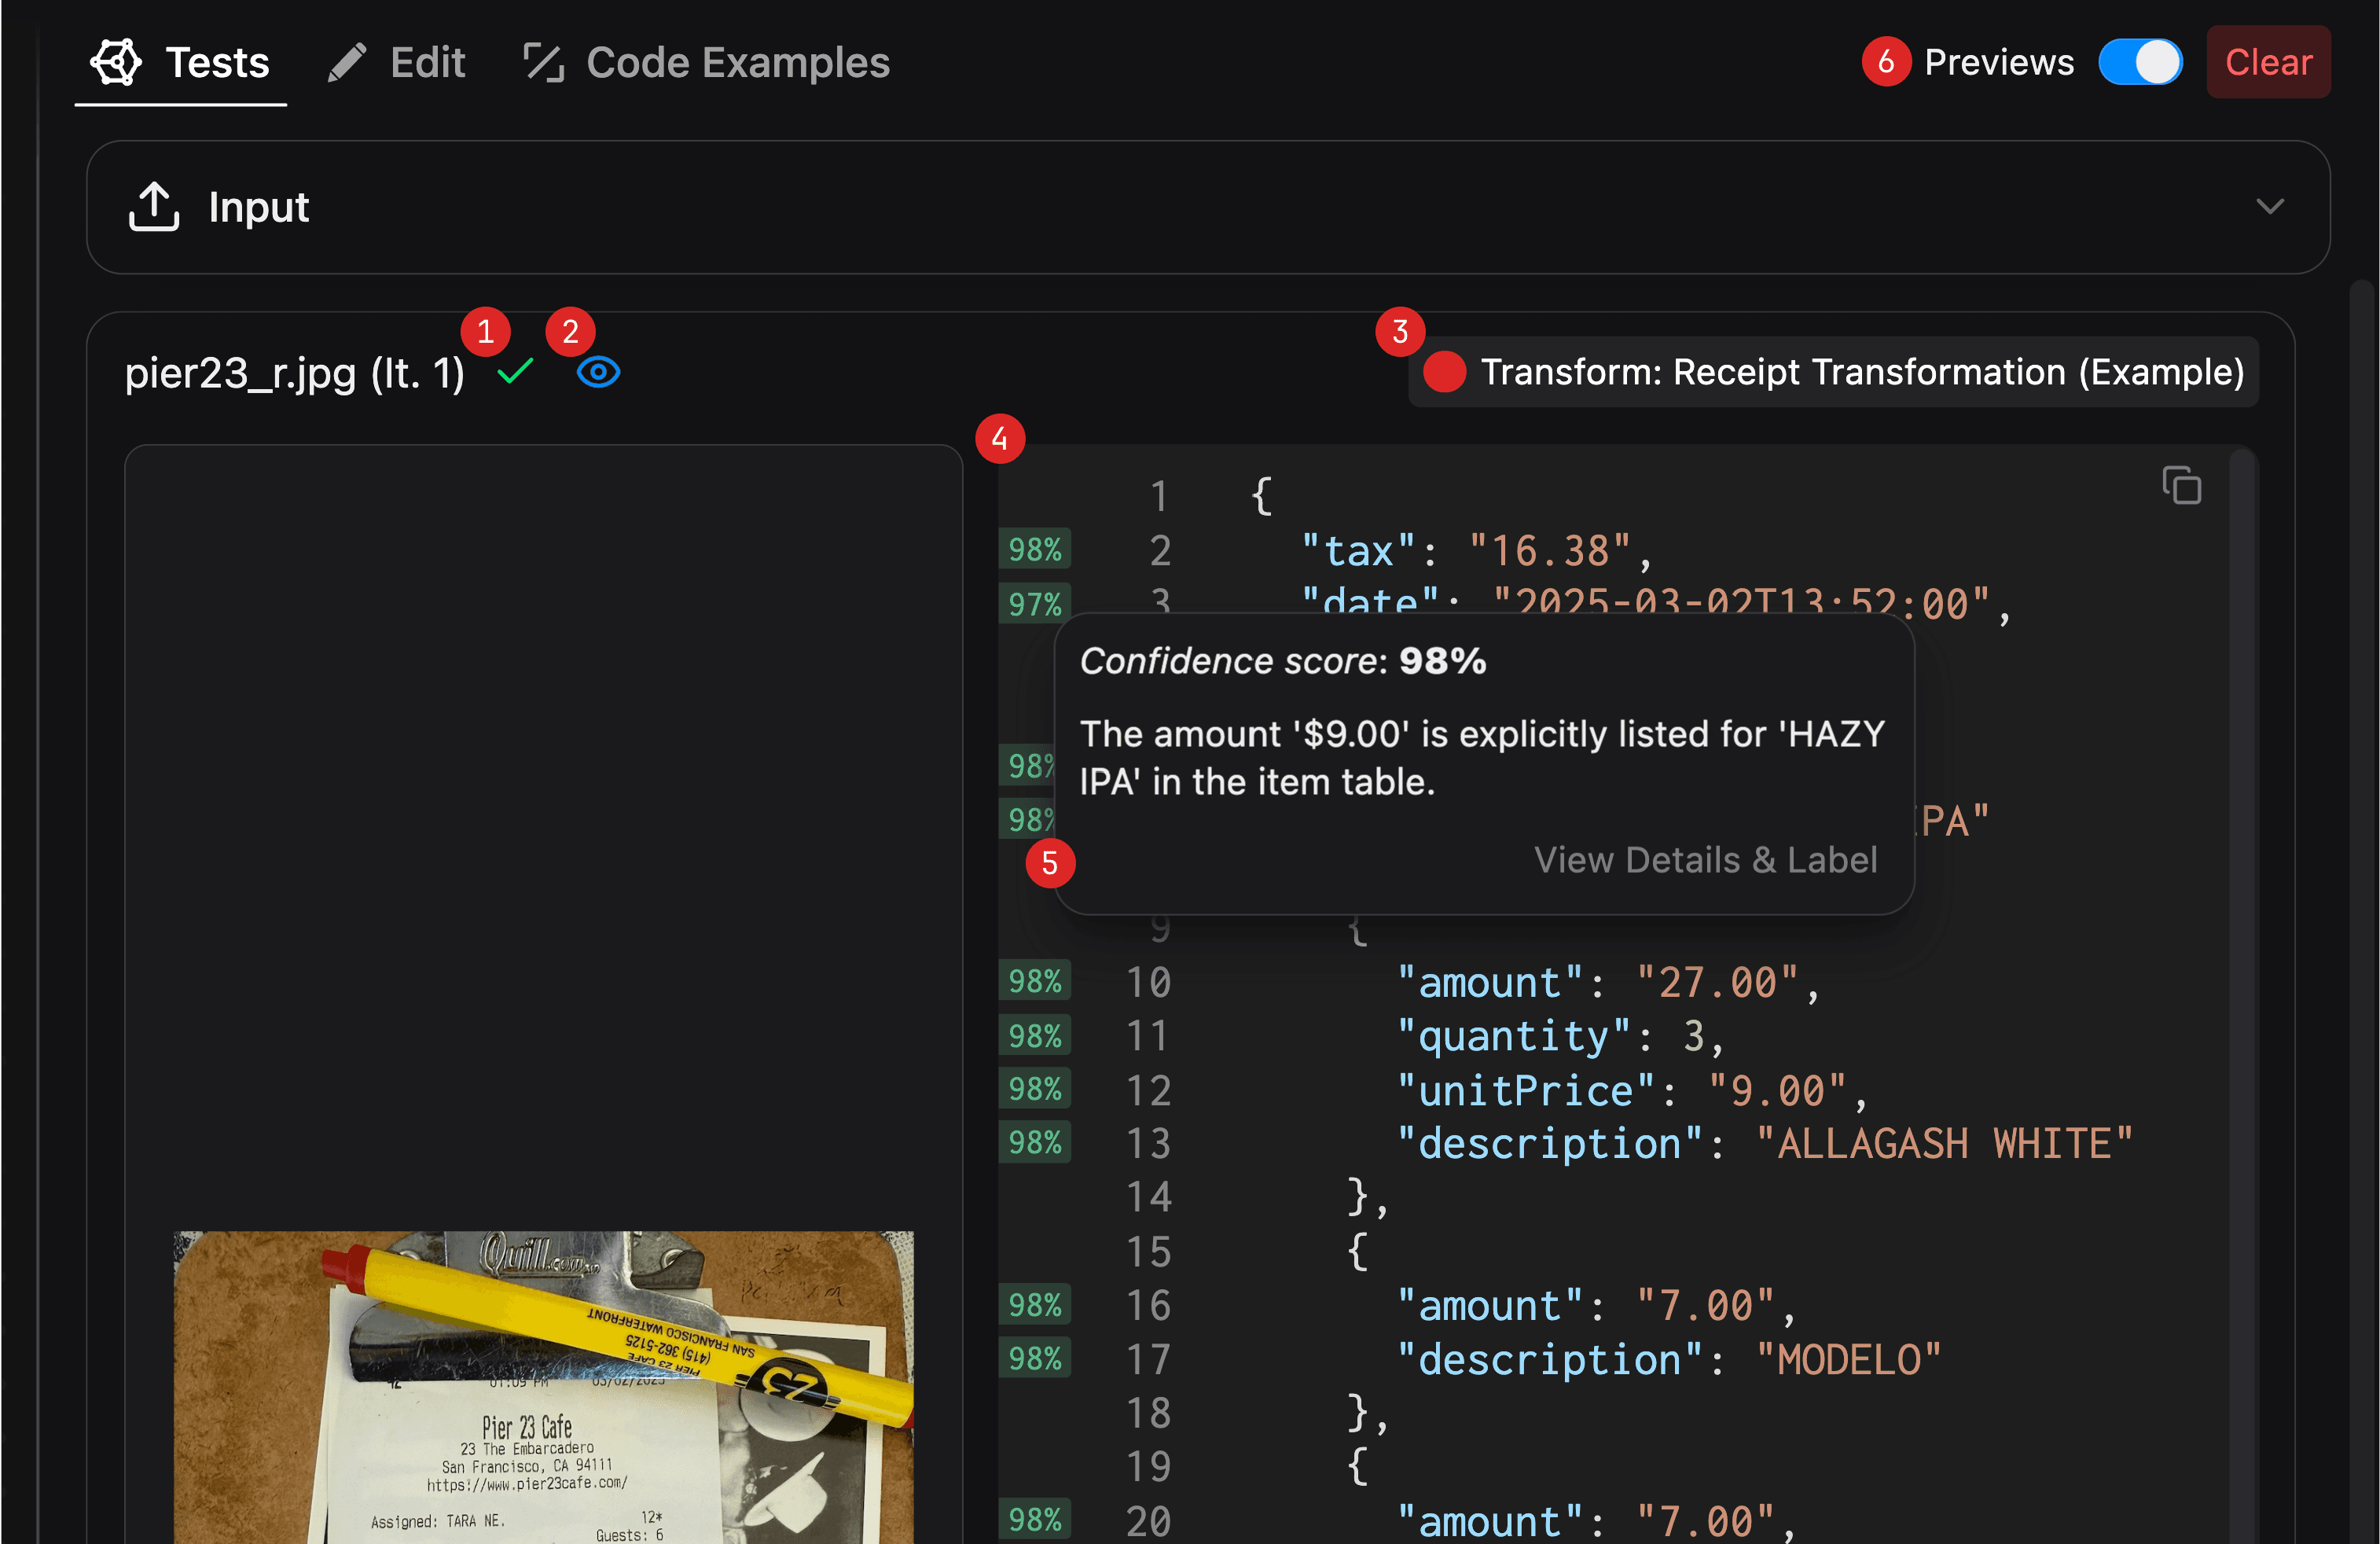
For each test file, you'll see one result card, which includes:
- A status indicator (1) showing whether the test passed or failed;
- An Open Preview button(2) to open a full-screen preview of the test file;
- A breadcrumb(3), showing the functions that were executed for the test file (for trees with multiple functions);
- The output(4), showing the result of the function execution;
- Shortly after the test results are available, you should also see the eval results(5) for each field in the output, showing the confidence score and reasoning behind it (visible on hover), with a shortcut to View Details & Label the transformation in the Accuracy dashboard.
For multi-function trees, you can use the breadcrumb to navigate between the functions and see the output of each function in the tree, e.g. what was the route of choice for the Route function.
You can also enable/disable in-line previews next to the output via the Previews toggle(6) or Clear the test results using the options in the right corner of the tabs menu.